Notes from Ford Fusion Sync Upgrade

Just sharing some notes about the firmware upgrade I did on my car today. It’s a 2016 Ford Fusion, which I learned runs Sync Gen 2. There are newer versions of Ford Sync on the newer model years, like Sync Gen 3 and Gen 4 that include features like Apple CarPlay and Android Auto. Sync 2 does not have these features, its limited to Bluetooth audio for music streaming and built-in navigation.

I don’t know if the firmware was ever updated by the dealership, but I’m going to assume that they didn’t. Prior to the update it had version 3.8 installed, updating the firmware brought it up to version 3.10… which is probably going to be the last update since the car is already 6 years old.

Ford does do a reasonably good job of documenting the process, their instructions are here - Update Ford SYNC® & Navigation Maps | Ford Owner Support

Before The Update

Here you can see that I was running version 3.08.15128.EA.10_PRODUCT

Creating your Flash Drive

My first mistake was formatting my USB drive as exFAT. When I plugged the exFAT formatted drive into the car it gave me an error. If you’re doing this on a car running Sync 2, make sure to format your drive as FAT32.

Installing the Update

Ford’s documentation says that the process could take up to 30 minutes. My experience lined up to that expectation, it took my car just short of 30 minutes to complete the update. I started the car, plugged the USB drive in, and was then prompted to confirm that I wanted to perform the update, after clicking OK it started a series of installation screens, reboots, and more installation screens.

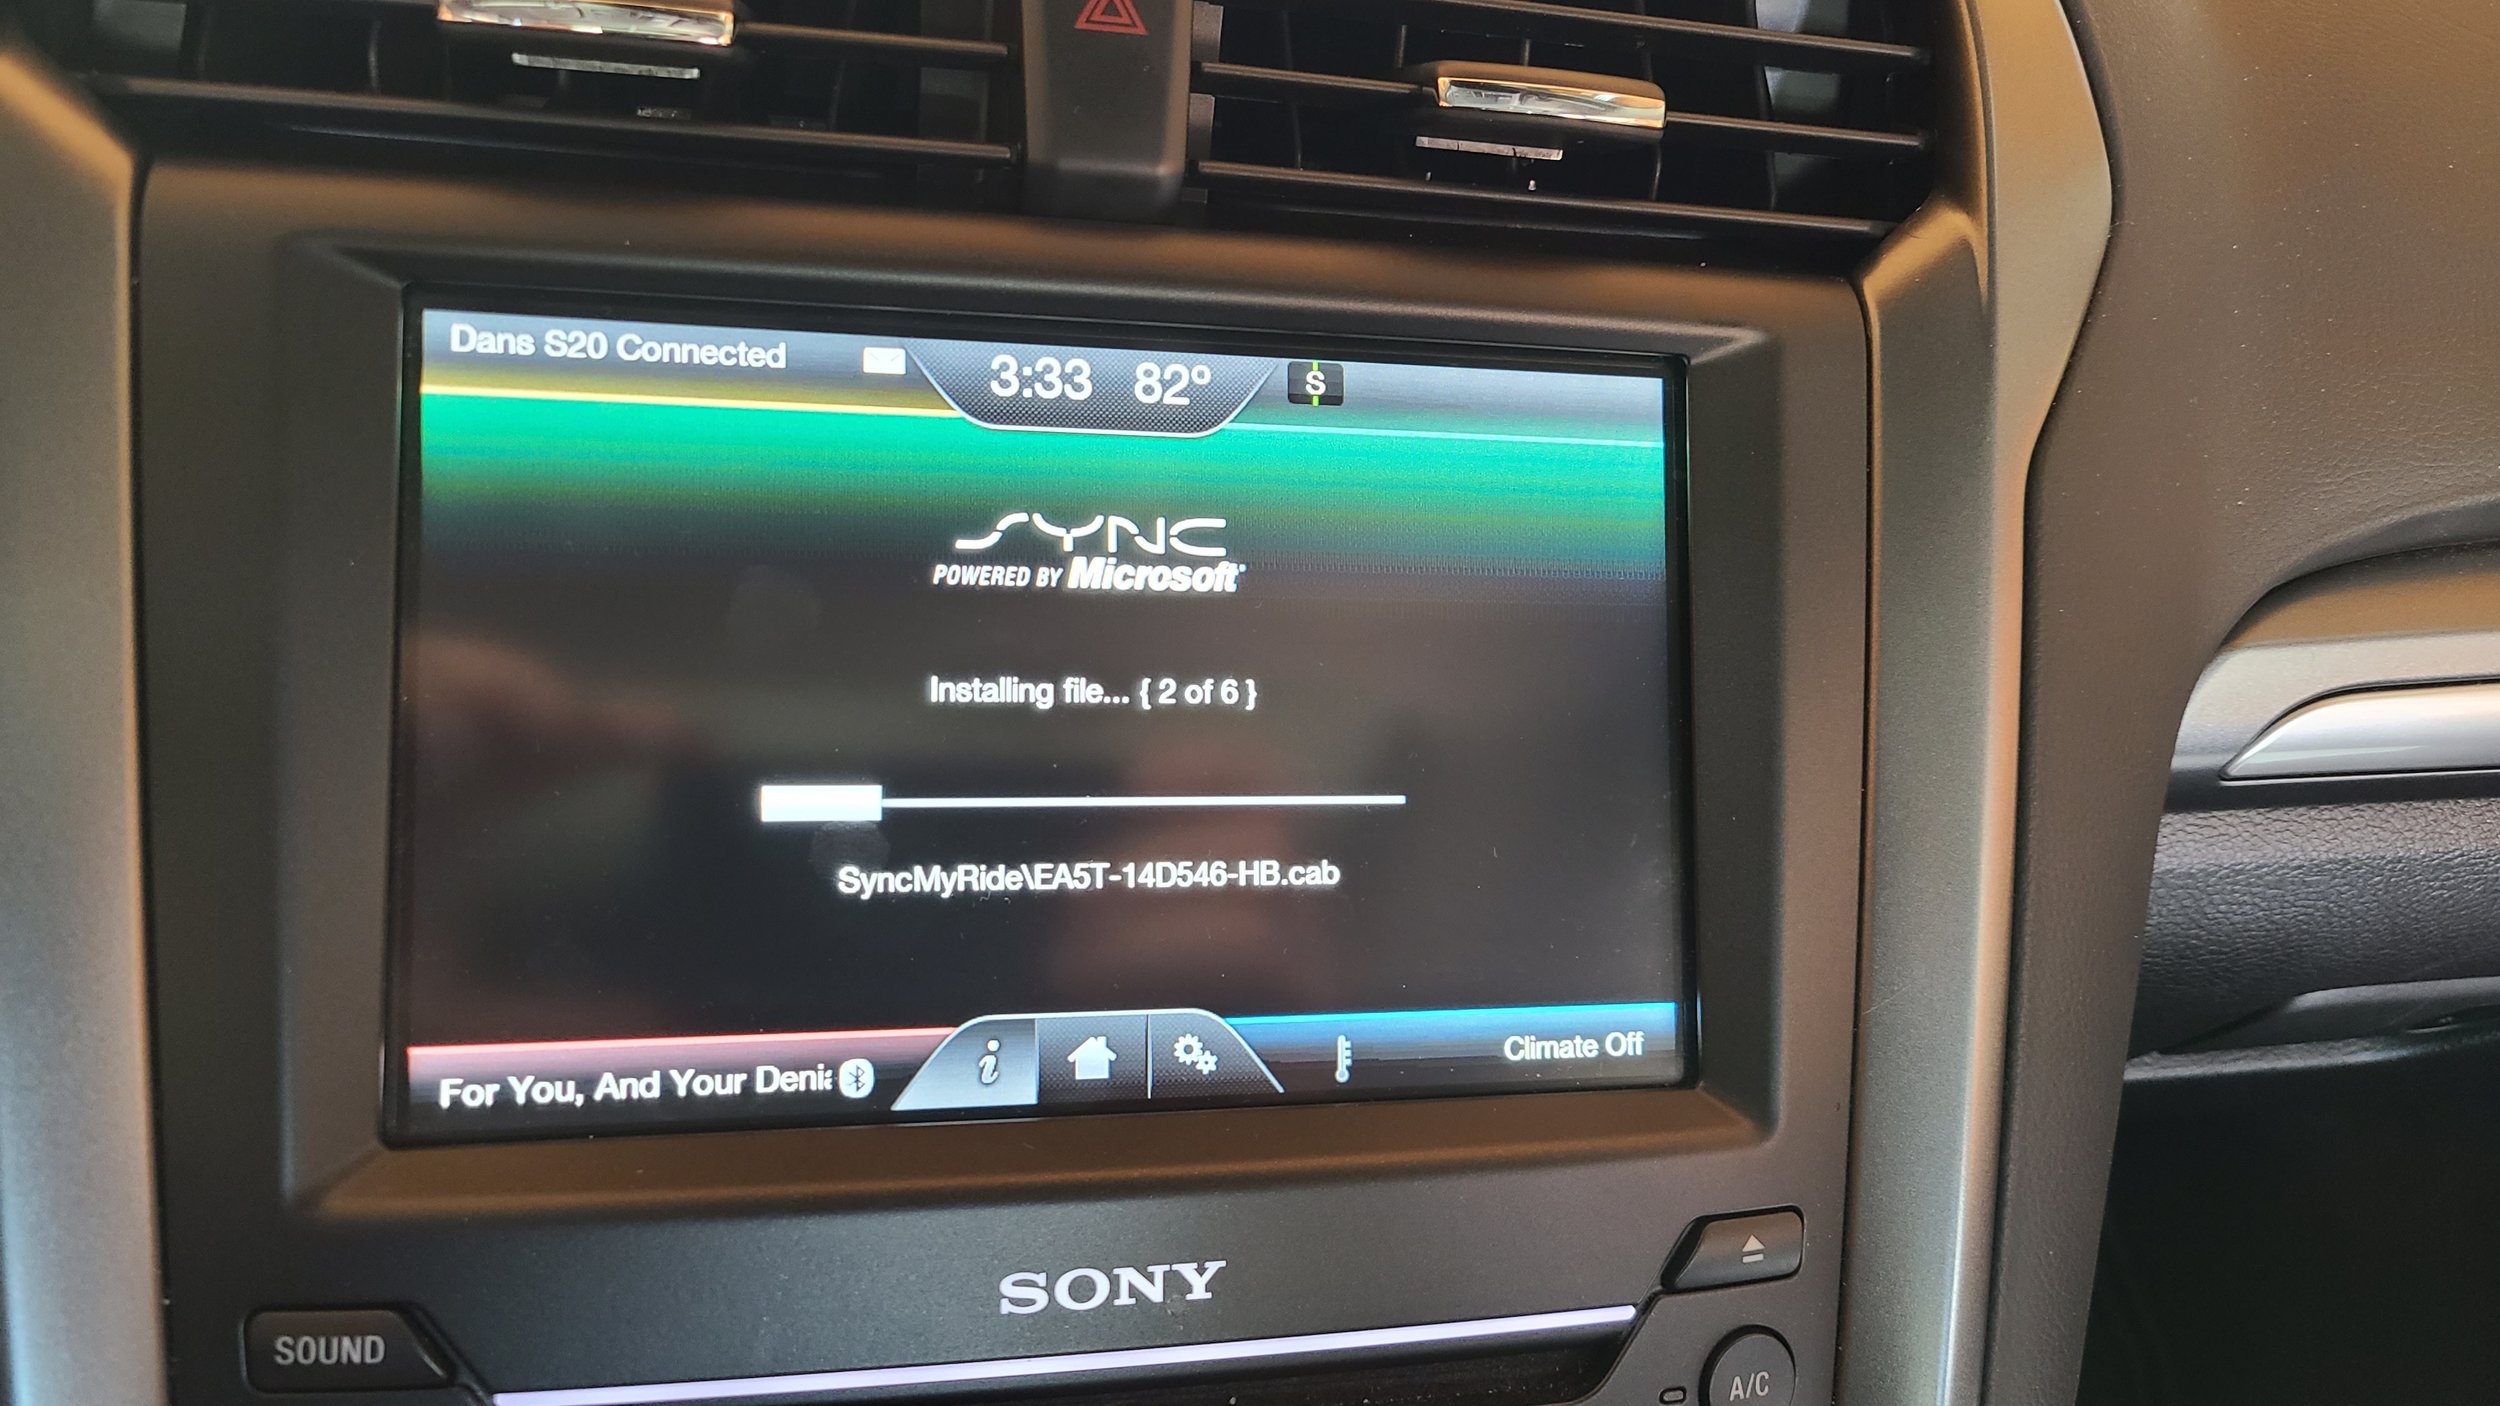
My first of many installation progress screens.

After a reboot, more installation progress.

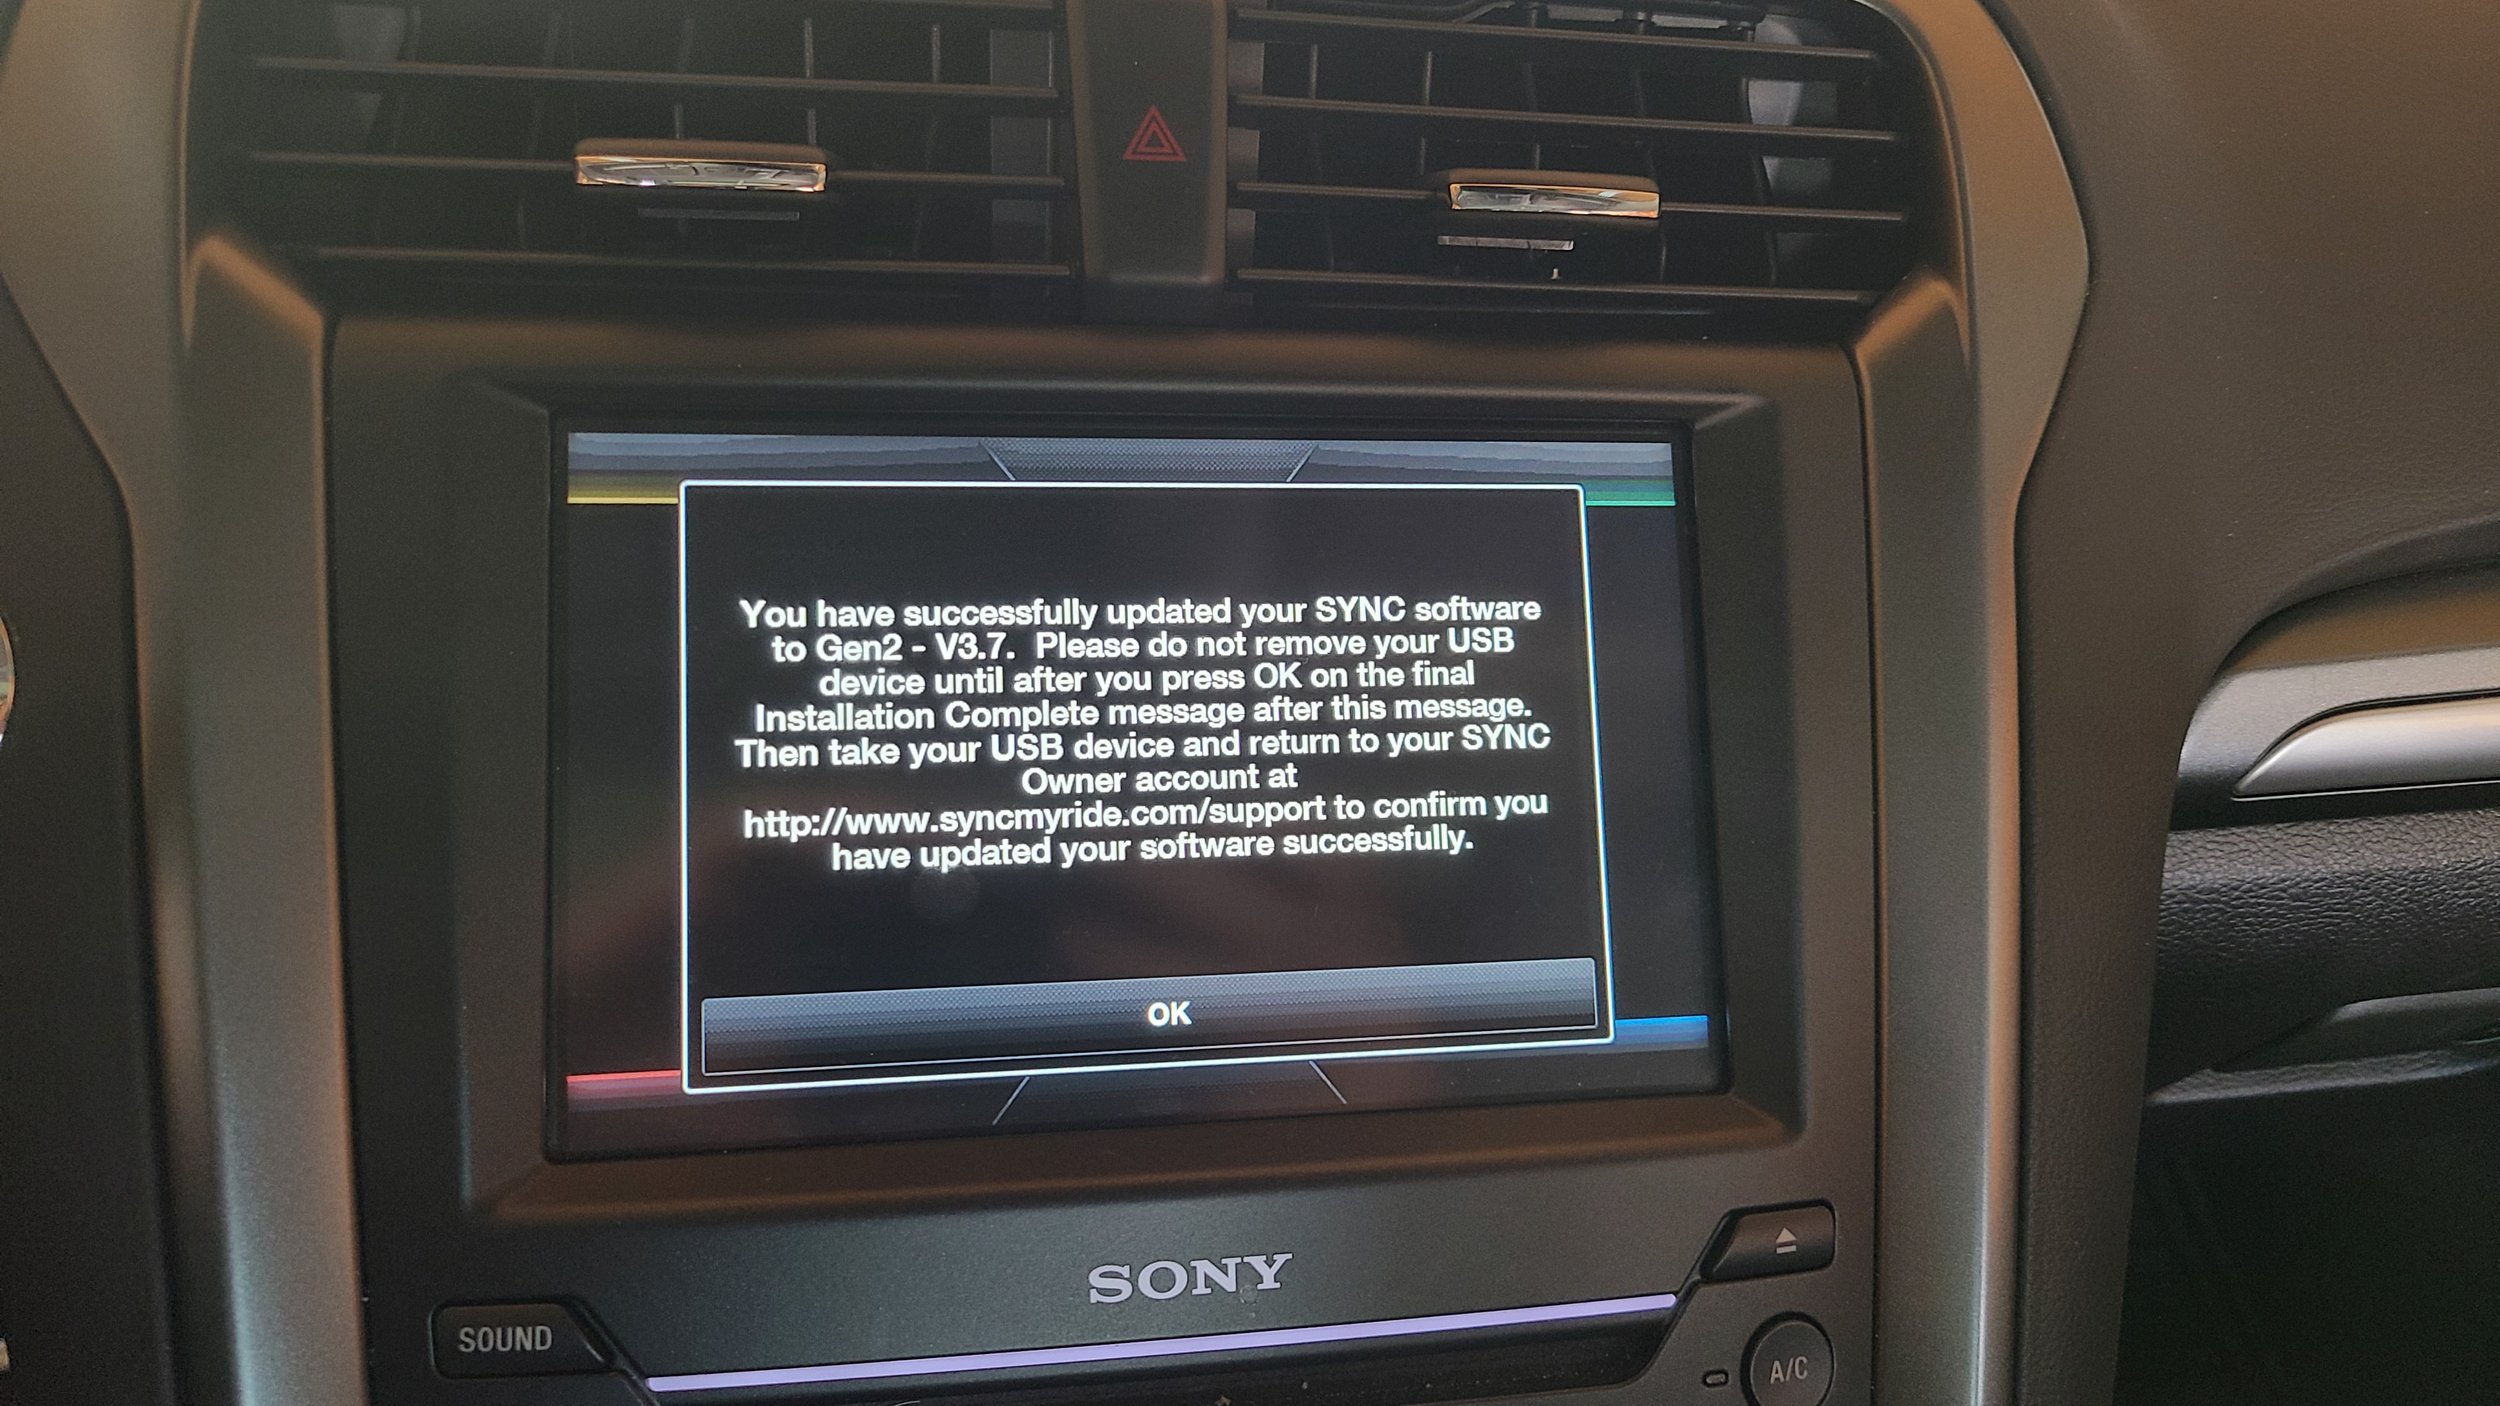
I thought it was strange that it said I successfully updated to Sync Gen2 - V3.7, the developers must have forgotten to update the text.

Success

After everything was done I confirmed the new version by going back to the system information screen.

Conclusion

My phone pairing did not survive the upgrade, so I had to re-pair the Bluetooth once the update was completed. I’m not sure if the update actually did anything useful for me. This is probably anecdotal but navigated the UI did seem a little bit quicker.

Dan does Woodworking (or at least attempts to)

I imagine anyone who buys their first home goes though what I am going though now. What is it you ask? I’ll tell you; its the thought that you’re going to fix everything yourself because you’re stubborn and know better than a tradesperson who has years of experience. You justify buying an arsenal of tools by saying that you’ll use them all the time, when in reality you’ll use them once then they will sit in the garage never to be touched again. In the end you end up spending more money on the tools and parts than it would have cost to call a professional. I, for one, fully accept this new found lifestyle… because life is about the journey, not the destination.

One of the many (51 to be exact) projects on my list is to build a workbench. I keep thinking about the video game Minecraft, where the workbench is one of the first things you build. After crafting the workbench you use your workbench to create bigger, more useful things. That’s what I intend on doing with my workbench.

I have a garage, but I don’t have a ton of space to store things and I didn’t want to turn half the garage into a dedicated workshop. I don’t have much woodworking experience, in fact the only woodworking experience I can even recall is building a pinewood derby car for Cub Scouts which might as well have been a million years ago. I’m willing to buy tools and spend the money for mid to high end tools and materials where it makes sense. I have a mid-sized car where the back seat folds down and I’m not willing to rent anything bigger to transport materials. Thinking about all of these things I came up with the following criteria:

  1. The workbench needs to be mobile

  2. It can’t be too big

  3. It can’t be too complicated to build

  4. The longest 2.x 4 I can fit in my car is 8’

  5. The largest sheet of plywood I can fit is 3’ x 6’

So where does one go from there? YouTube of course. After spending hours watching all kinds of builds, from hand made benches based on designs from the 1700s, to the weekend DIYer who documented their process, I ended up making the same decision that many have before me. That is to use Steve Ramsey’s Basic Mobile Workbench design. The design checked all my boxes and the design that Steve put together is easy enough to follow.

As I’m writing this I estimate I’m about halfway though the project. I didn’t start documenting it till after I had milled up the 2 x 4s down into smaller parts. I’ve been spending 1-3 hours a day after work on this project. I think I have about 6 hours into the project so far. Its a great escape after working with people and computers all day.

Here’s my table saw, its the DeWalt 7485

Here’s my table saw, its the DeWalt 7485

This was my first experience with a table saw. After watching tons of videos about kickback, I was quite nervous to use it at first. I turned it on and off several times before making any cuts just to get a feel for how it operates. Once I actually made my first cut I was surprised how easily it cuts though wood, it really is like butter.

Making rough cuts with a circular saw

Making rough cuts with a circular saw

Rough cutting the 2 x 4s using a folding table and saw horses, then moving it to the table saw for the more accurate cuts worked well for me.

Gluing the wood

Gluing the wood

Another first, wood glue. I didn’t know how much or what to get, but this size and type seemed to be perfect for this project. I ended up using almost all of it between gluing the legs and tabletop.

Testing my plywood sheets

Testing my plywood sheets

I probably could have done a better job of selecting better plywood sheets. One of them was a bit bowed, knowing nothing about how this works, I figured I could get the bow out with copious amounts of glue and clamps.

Glue makes a mess

Glue makes a mess

I let it sit like this over night

I let it sit like this over night

Sanding things

Sanding things

Above are the four table legs, the plans call for two 30” 2x4s to be glued and screwed together to form each leg. I thought I did a good job of getting each piece to 30”, but there were some minor inconsistencies in my cutting. To remedy the situation I clamped them all together then used the random orbit sander on the end to line everything up, which took forever (there has to be a better way). After all of that sanding the legs are closer to 29 15/16th” long.

Building the leg assemblies

Building the leg assemblies

Its actually almost level!

Its actually almost level!

Finished up for the night, day 3 in the bag

Finished up for the night, day 3 in the bag

I’m really happy with the progress I’ve made so far. I did make a mistake cutting one of my 2x4s so my next step is to go back to the home center to pick up another one. But that will have to wait till tomorrow.

Automatically Move OneNote Notebooks into OneDrive

Microsoft held their annual Ignite conference last week and I was fortunate to be able to attend this year. One of the coolest features (cool is relative) that was teased is the ability for the OneDrive sync client to automatically import OneNote notebooks into OneDrive. The current behavior is not ideal, if you enable PC Folder Backup (Formerly Known Folder Move), the UI tells you that you must manually move your OneNote notebooks into OneDrive using OneNote before allowing you to turn on the backup and gives a link to an article that doesn’t do a great job of explaining exactly what to do. Alternatively, if you move your .one and .onetoc2 files into a folder your syncing with OneDrive using File Explorer the next time you open the notebook there will be a good chance that you’ll see an error across the top of OneNote that says something to the effect of “your notebook is in archival format”. Not great.

OneNote auto import (I’m not sure if this feature has an official name, I’ll call it OneNote auto import for now) to the rescue! In the session BRK3262: Microsoft OneDrive deployment and adoption deep-dive Gaia Carini demonstrates the new OneNote auto import feature. She mentions that the feature is coming to insiders soon and will be rolled out to the production ring by the end of 2019.

But I was curious as to which version of the OneDrive sync client supports the feature so I tested some things out. Fist I checked which version of the OneDrive sync client I have, I’m in the insiders ring and as of 11/11/2019 I’m on version 19.192.0926.0011.

OneNote Auto Import 2.png

To test I stopped the OneDrive sync client then using OneNote 2016 I created a new notebook called “OneNote to OneDrive Notebook Move”, as you see in the screenshot below the notebook is stored at C:\Users\Danie|\OneDrive\Documents\Testing\OneNote to OneDrive Notebook Move, note this is stored in a personal OneDrive account, not a OneDrive for Business account.

OneNote Auto Import 1.png

I started the OneDrive sync client again to see if the feature works… it didn’t. The .one and .onetoc2 files were copied up to OneDrive but the OneNote auto import experience did not occur.

OneDrive copied the files but my experience was not what was shown at Ignite.

OneDrive copied the files but my experience was not what was shown at Ignite.

Well that was lackluster, but then I thought what if I try it with a OneDrive for Business account (as opposed to a OneDrive personal account)? I shut down the OneDrive sync client again, then using OneNote 2016, I moved the notebook to a folder that I’m syncing to my OneDrive for business account, my new local path for the notebook is C:\Users\Danie\OneDrive - Dan Letsinger\Documents\OneNote Notebooks.

I also turned on dark mode for OneNote 2016 during my testing, neat!

I also turned on dark mode for OneNote 2016 during my testing, neat!

I started the OneDrive sync client and saw the magic happen immediately. The .one and .onetoc2 files were uploaded to OneDrive and the local files were removed.

Success!

Success!

To be sure, I opened OneNote 2016 and I see that the OneNote notebook is now syncing to my OneDrive for Business account.

OneNote Auto Import 6.png

Conclusion

It appears that if you have the OneDrive sync client 19.192.0926.0011 (or newer I’m assuming) and you’re syncing a OneDrive for Business account that OneNote auto import will migrate your OneNote notebooks without requiring you to take extra steps.